Shopping online with Relay Foods is a mostly good experience, but every now and then, I get something that I didn't expect. This week, for instance, I ordered tabbouleh, which is usually predominately bulgar (cracked) wheat. But Asmar's Tabbouleh is mostly parsley. I like parsley, but as an ingredient, not the main portion of the salad.
So what to do with 8 ounces of mostly parsley? I could see using some of it in a salad dressing or marinade. But when my lunch date canceled out on me and I was out of cold cuts, I decided on a bit of pasta for lunch. And you know what? The parsley came in very handy.
Quick Orzo Lunch
Serves 1
Ingredients
Salt
1/3 cup uncooked orzo or other small pasta
8 cherry tomatoes
2 tablespoons Asmar's Tabbouleh (or chop together 2 tablespoons parsley and 1 green onion with a little lemon juice and olive oil and a couple of mint leaves)
1 ounce goat cheese
Instructions
Fill a deep saucepan half full of water. Add salt. Bring to a boil. Add orzo and cook until it turns white. Drain, reserving a tablespoon of water.
While the orzo is cooking, smash the cherry tomatoes gently in a microwave-safe bowl. Cook for 1-2 minutes until very hot. Put the parsley mixture and goat cheese in a mixing bowl.
Immediately after draining, put the cooked orzo in the bowl with the parsley mixture and goat cheese. Add the tomatoes and toss until well mixed. Eat while hot.
Showing posts with label pasta. Show all posts
Showing posts with label pasta. Show all posts
Thursday, February 28, 2013

Thursday, January 31, 2013
Just the facts? What nutrition labels hide

I took out the pack of Kirkland Crumbled Bacon from the fridge and heated a tablespoon for an omelet I was making. While I was waiting for it to cook, I got to reading the recipe on the side for Linguine Carbonara and comparing it to how I usually make the dish.
I usually use 2 ounces of uncooked pasta per person, and this recipe called for a pound, so I'm assuming it will feed eight people. The rest of the ingredients are looking pretty good, a pretty nutritious dish, actually - until I saw how much bacon it called for: 1 cup.
For most ingredients and liquids, a cup contains 16 tablespoons. But some things that have a lot of air in them can fluff up and measure out differently. So from my measurement, 8 tablespoons almost filled up a cup, but not quite. So I decided to go by the weight the package said a tablespoon of bacon crumbles was, 7g. Well, according to metric-conversions.org, 56 g (8 x 7g) is approximately 2 ounces. On my kitchen scale, a cup of bacon crumbles weighed in at 6 ounces. If a serving is 7g, then why is Kirkland advocating a recipe that uses three times the amount that is suggested as a serving?
Moreover, I know a lot of families of four eat a pound of pasta at a sitting. Divided by 4, that would be 6 servings of bacon per person in this recipe. That's 12 grams of fat (6 saturated) and 1440 mg of sodium (about 60 percent of the daily value) just from the bacon.
According to Wikipedia, the Nutrition Facts label was mandated for most food products under the provisions of the 1990 Nutrition Labeling and Education Act, per the recommendations of the U.S. Food and Drug Administration. It was one of several controversial actions taken during the tenure of FDA Commissioner Dr. David Kessler. The law required food companies to begin using the new food label on packaged foods beginning May 8, 1994.
The government's attitude is consumer beware: below is fda.gov's suggestion for using the label.
The first place to start when you look at the Nutrition Facts label is the serving size and the number of servings in the package. Serving sizes are standardized to make it easier to compare similar foods; they are provided in familiar units, such as cups or pieces, followed by the metric amount, e.g., the number of grams.If anyone wants the recipe after all this, message me or comment below and I'll input it. Or use the one I published here previously: http://lkcafe.blogspot.com/2009/12/simple-but-satisfying-dinner.html It doesn't take a cup of bacon crumbles.
The size of the serving on the food package influences the number of calories and all the nutrient amounts listed on the top part of the label. Pay attention to the serving size, especially how many servings there are in the food package. Then ask yourself, "How many servings am I consuming"? (e.g., 1/2 serving, 1 serving, or more) In the sample label, one serving of macaroni and cheese equals one cup. If you ate the whole package, you would eat two cups. That doubles the calories and other nutrient numbers, including the %Daily Values as shown in the sample label.
Wednesday, March 16, 2011
Painting with pasta

The recipe below is somewhat low in fat, quick to make, and the contrast between the ivory orzo and the toasted vermicelli adds interest to the plate. Use a non-fat chicken broth (add salt to taste). I used a 12-inch sauté pan to hasten the absorption; if you use a smaller saucepan, you may need to adjust the time. This recipe was enough for two servings, and a second helping.
A little note about vermicelli: It goes by various names, and is used in the cuisines of many countries, not just Italy. In that country, it's also called orati in Bologne, minutelli in Venice, fermentini in Reggio and pancardelle in Mantua. (Perhaps that's because "little worms" isn't the most appetizing name for a pasta, although it is very descriptive of the untoasted cooked noodles.) If you can't find it, you can break angel hair pasta into tiny pieces and use it as a substitute. In Mexico, it's fideo; in Egypt, it's called she'reya (شعريه) in Arabic, and a very common dish mixes the dry toasted pasta cooked with rice. The most common vermicelli/rice dish in the United States is Rice-a-Roni®. For a home version that's not nearly as salty or processed, click HERE.
Orzo looks a lot like big rice grains, but it's pasta. Toast the vermicelli until it's very brown (without burning it) to increase the contrast with the orzo.
Lori K's orzo with vermicelli
Serves 2
Ingredients
1 tablespoon olive oil
1/2 cup vermicelli
1/2 cup orzo
2 cups chicken broth
Salt to taste, if broth is unsalted
Instructions
Heat olive oil over medium heat in a skillet or wide saucepan (one with a lid, which will be used later). Add the vermicelli and cook, stirring frequently, until brown, about 5 minutes. Add the orzo and chicken broth, cover, bring to a full boil, then turn burner to low and cook for 15 minutes until most of the broth is absorbed. Serve.
Saturday, December 11, 2010
Thigh high
 |
| What are you looking at? My thighs? |
Chicken thighs with penne pasta and stewed tomatoes
Serves 2
Ingredients
1 can (15 ounce) stewed tomatoes
2 boneless skinless chicken thighs
1/4 cup Newman's Own Light Lime dressing4 ounces dry penne pasta
1 tablespoon olive oil
1/2 chopped onion
Grated Parmesan to taste
Instructions
Put the stewed tomatoes in a small saucepan and heat on low. Pound the thighs until they are an even thickness. Marinate with the lime dressing. Bring a pot of salted water to boil. Add pasta. Meanwhile, heat the olive oil in a skillet big enough for the 2 thighs. When medium hot, add the thighs. Cook the chicken about 8 minutes, then turn. Add the onions and cook for about 2 minutes, then add the rest of the marinade and cook for 5 more minutes. After the pasta has cooked for 12 minutes or until al dente, drain and toss with a little olive oil and Parmesan. Drain the excess liquid from the tomatoes and serve the tomatoes, pasta and hot thighs and onions immediately. Grate extra Parmesan on the tomatoes to taste.
Thursday, July 8, 2010
Right out of the box
Then we started to cook fresh and the recipes collected dust.
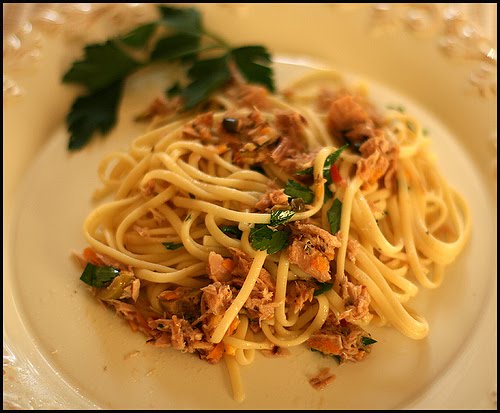
Today, as I emptied an open box of linguine into my pasta jar, I spied a recipe on the package for linguine with tuna, olives and capers. OK, that sounded pretty good. And it was.
Here's to a new generation of "ripped from the box" recipes.
De Cecco's Linguine with Tuna, Olives and Capers
Serves 6-8
Ingredients
1 pound linguine
Salt
1/4 cup olive oil
1/2 cup of black olives, pitted and finely chopped1 1/4 tablespoon capers
2 cloves crushed garlic
1 tablespoon chopped parsley
Pepper
1 small can tuna, shredded with fork
Instructions
Cook the pasta for 11 minutes in boiling salted water. In the meantime, sauté in olive oil the olives, capers and garlic. Add a few tablespoons of the boiling pasta water, then put in the parsley and some ground pepper. Let it cook for a few minutes, then remove from heat and add the tuna. Drain the linguine and put in a serving dish. Add the sauce, mix well and serve.
Thursday, April 1, 2010
Canned eats

The Minimalist, as Mark Bittman is known in the New York Times, cooked out of his pantry this week, and his creation shows just how necessary a well-stocked pantry is for those times that you just can't go out to shop.
But why do all recipes have to serve 4-6 people? This one is easy to cut down for two or three people, and can serve four who are watching their weight, or who like big salads with their dinner.
Pasta With Sardines, Bread Crumbs and Capers
serves 2-4
Ingredients
Salt
2 tablespoons extra virgin olive oil
1/4 cup bread crumbs, ideally made from stale bread
1/2 onion, chopped
Freshly ground black pepper
1/2 pound long pasta
1/2 teaspoon grated lemon zest
1 tablespoon drained capers
1 cans sardines packed in extra virgin olive oil (about 4 ounces)
1/4 cup chopped fresh parsley, plus more for garnish.
Instructions
Bring a large pot of salted water to a boil. Put half the oil (1 tablespoon) in a medium skillet over medium heat. When it’s hot, add the bread crumbs and cook, stirring frequently, until golden and fragrant, less than 5 minutes, and then remove. (Wipe out the pan so you don't get burned crumbs for the next step.) Add the remaining oil and the onion to the pan, sprinkle with salt and pepper, and cook, stirring occasionally, until softened, about 5 minutes.
Meanwhile, add the pasta to the boiling water and cook until just tender; drain, reserving some of the cooking liquid. Turn the heat under the onions to medium-high and add the lemon zest, capers and sardines; cook, stirring occasionally, until just heated through, about 2 minutes.
Add the pasta to the sardine mixture and toss well to combine. Add the parsley, most of the bread crumbs and some reserved water, if necessary, to moisten. Taste and adjust seasoning, garnishing with more parsley and bread crumbs.
Wednesday, January 6, 2010
Pasta update
Tried some more sous vide pasta today (while cooking my first King Cake - more on that, later), using 2 ounces of pasta and 3 ounces of water. It was a lot firmer, even after an hour and a half cooking. (I checked it at 45 minutes; not quite to al dente. The starchiness was still a little too overwhelming, even after a rinse in fresh water. And those who have said that the salt intensifies too much in sous vide cooking - I don't think they've cooked pasta. Still pretty bland.
More experiments to come!
Saturday, December 5, 2009
The cycle of soup
 The soups section in the supermarket seems to take up more and more of the aisle each year. Chefs have often, and often loudly, decried the American habit of thinking soup comes out of a can to the tune of "Umm, umm, good!" Some such as Wolfgang Puck have decided to add their soups to the mix. The varieties now are more numerous, but something about canning still doesn't do much for soups.
More cooks could become better soup makers if they just set aside their cookbooks once in a while and think about the cycle of soup.
First, you make a broth or stock. Take those trimmings that you would have thrown out, skin and tendons of meat, or the carrots, celery, tomatoes and onions slightly past their prime, and cover them with water and a little salt, add a bay leaf and a few peppercorns, and simmer for several hours. Strain and then you can toss the cooked remains into the garbage or compost. For meat liquids, put in the fridge or freezer until the fat congeals at the top, then throw that out, too.
If you're not ready to use it, put it in a container marked with the date and contents.
When you're ready, you can get creative. Use leftovers in your fridge if you can. If your broth is strong enough, a little vinegar on a cup or less of leftover pasta salad will be absorbed and add to the flavor of your soup. Or maybe you have a cup of leftover rice; add it to 2 cups of chicken broth, bring to a boil with the rice, then stir a little of it into a cup containing a beaten egg and the juice of a lemon. Turn the soup down to a simmer. Gentle stir the contents of the cup into the hot soup.
Experiment. If you like a combination of spices in a dish, chances are you will like it in a soup with similar ingredients. Just be aware that as a soup cooks, water evaporates, so the spices will intensify, and not all at the same rate. Chilies can be a lot hotter in soups, as can pepper. Basil may disappear (that's why it's good to add fresh basil just before serving). Lemon can brighten a bean soup; sherry can make it richer.
If you're lucky and you like soup, you may never have to throw out any leftovers again.
Saturday, July 18, 2009
Dining in San Diego
 Photo © Lori Korleski Richardson
Alexander's (3391 30th St., San Diego) manages to look cozy even with an all-white interior. Or maybe it was we who were cozy, seated six to a corner booth more suited for four. Because of the squeeze, they offered us two free appetizers.
We decided on the grilled salmon and baked brie cheese, topped with pesto and sun dried tomatoes, served with garlic bread ($12.25) and the ensalada caprese: fresh mozzarella layered with beefsteak tomatoes and basil, with extra virgin olive oil and oregano ($9.25). Both were exceedingly well-prepared and delicious.
The pastas run from $10.50 to $16.50 and the portions are huge. The pizzas, said to be among the best in town, are pricey - $14 to $21.50 for 13-inch pies. The entrees run from $20.25 for the chicken dishes to $26.25 for the filet mignon and garlic shrimp; the fish for the night was halibut and was cooked to perfection. The desserts all looked great, but only one among us felt like he had any room left after the main course. The waiter thoughtfully brought spoons for all of us, however, and we all had at least a bite of the apple pie and the smooth housemade vanilla ice cream.
The bustling place, the frenetic pace, and the attentiveness of Alexander to our dishes made the somewhat scattered and inconsistent service seem like more of a distraction than a major annoyance.
The pastas run from $10.50 to $16.50 and the portions are huge. The pizzas, said to be among the best in town, are pricey - $14 to $21.50 for 13-inch pies. The entrees run from $20.25 for the chicken dishes to $26.25 for the filet mignon and garlic shrimp; the fish for the night was halibut and was cooked to perfection. The desserts all looked great, but only one among us felt like he had any room left after the main course. The waiter thoughtfully brought spoons for all of us, however, and we all had at least a bite of the apple pie and the smooth housemade vanilla ice cream.
The bustling place, the frenetic pace, and the attentiveness of Alexander to our dishes made the somewhat scattered and inconsistent service seem like more of a distraction than a major annoyance.
Wednesday, June 24, 2009
A slow solution to sauce
 A former Sacramento Bee co-worker, Stuart Leavenworth, left, is doing an apprenticeship at Oliveto in Oakland and is chronicling his learning experience in newspaper stories and on a KQED blog as well, Bay Area Bites.
 His most recent posting was on how they do the pasta sauce, the ragu, at the restaurant, and it sounds stupendous. I offer the recipe below for those who aren't regular readers of his blog, but I'd suggest you check it out from time to time, as well. Stuart is a talented writer as well as a great home cook - not a lot of chefs can make that claim.
Stu’s Ragu
Makes: 8-10 servings of sauce
Ingredients
2 pounds ground meat (Beef, pork or equal amounts of both. For beef, try ground chuck or get adventurous with ground hanger steak, beef cheeks, etc. For the pig, try ground pork shoulder.)
4 medium yellow onions
5 stalks celery
5 carrots
4 tablespoons finely chopped fresh sage
2 tablespoons finely chopped fresh oregano
6 cups dark chicken or veal stock
1/2 cup white wine
1/2 cup high-quality tomato paste
1 cup cream (optional)
Salt and pepper to taste
Instructions
1. Dice the onions, celery and carrots into a mirepoix -- cubes smaller than 1/4 inch in size. As you are dicing the vegetables and mincing the fresh herbs, start cooking your meat. Use a heavy bottomed Dutch oven or stew pot. This is essential. The bottom of the pan has to be thick and heavy enough to brown the meat, without scorching it.
2. Use high heat to start your browning process. But keep an eye on it, and adjust the flame accordingly. It's okay for the meat to stick and brown, but you don't want it to blacken or burn.
3. After you have built an even layer of fond on the bottom, toss your vegetables on top of the meat. Leave them there for at least 15 minutes, allowing them to release their juices to the bottom of the pan.
4. Give your meat and vegetable a rigorous stir with a wooden spoon, and scrape up the fond layer that has now been deglazed by the vegetables.
5. Turn up heat slightly, and allow this to cook down and brown again, then add a shot of wine -- no more than a cup. Stir and scrape.
6. Allow this to cook down again. When browned, add a cup of stock. Repeat the process and add your tomato paste, diluted with a half cup of stock.
7. Watch your ragu carefully at this point. The addition of tomato paste could lead to scorching. Keep the heat up, but stir it regularly as the fond starts to reform. When it is nice and brown, but not scorched, add two or three cups of stock -- enough to make it slightly more soupy than you'd want for a sauce.
8. At this point, your ragu should have a lovely, brownish-red color. Bring it to a boil and then turn down to a simmer. Allow it to simmer for two to four hours, stirring occasionally and adding more stock, if necessary.
9. Before serving, you have the option of adding cream -- as much or as little as you want. Too much cream will dilute the intensity of the sauce, so be judicious at first.
10. You can take this basic sauce in many different directions. Add minced porcini mushrooms early in the cooking for an earthier flavor, or cinnamon or nutmeg to give it a spicy edge. Use different combinations of fresh herbs.
11. The final step, of course, is marrying the ragu with the pasta. Don't just ladle it on top. Cook your pasta just short of al dente, then mix it thoroughly in a skillet with an appropriate amount of sauce and then serve it immediately. Sprinkle some Parmesan cheese on top.Monday, May 11, 2009
Food on the cheap
 Although there are some indicators that say we may have hit bottom on the recession, for many of us who are no longer in our careers of a year or two ago, there's no time like the present to explore ways to save on our food costs, especially if we enjoy good food and don't want to sink into the malaise of manufactured mishmash. I once had a relative who used to justify every bad food purchase she made with "Well, it was only $2," without stopping to think what the total cost of all those $2 purchases were.
To eat well on a budget, here are a few basics to keep in mind:
- Meat and processed foods are the most expensive things in most peoples' carts, excluding alcohol, tobacco and nonfood items. Cut out the latter and learn to make those items you like. Make them in bulk and freeze them if you need to save time. On the meat front, figure out what you like the most and what's best for you, and don't eat more than 4 ounces of it (about the size of a pack of cards). Even filet mignon, at about $20 a pound, comes out to about $5 per person with those guidelines. A whole chicken, at 89 cents a pound, isn't a real bargain if you only like the breast and don't like soup; better to look for frozen tenderloins on sale. Learn all you can about cuts of meat. A book that has helped me a lot on this is Emilie Taylor's "Inflation-Fighter Meat Book," which got me into beef shanks (lots of good beef flavor, low in fat, and tender as can be when slow-cooked all day with a base of root vegetables) and showed how to get a rib steak and stew or chili meat from certain chuck steaks.
- Protein isn't just meat, as your vegetarian friends can tell you. Rice and beans, macaroni and cheese, peanut butter on toast or bagel are all fine substitutes, as is tofu. If you don't like the texture of the stuff out of a box, wrap it in a towel and put a weight on it in the fridge overnight. The towel will be sopping wet by the morning, and the tofu will be drier and will readily soak up any sauce you want to use to flavor it.
- Have a pasta night. Experiment with different kinds and different sauces. Try to make your own; it's not hard and you'll have a satisfaction that is worth more that what you would have paid for fresh pasta at the grocery store.
- Grow a herb garden. Even if herbs are more than $2 per pot, they will grow and yield many times the amount you'd have to pay for in a store, and you can snip only as much as you need. Some even come back year after year.
- Other good substitutes to try: polenta, chilled overnight then grilled or fried, with pesto or spaghetti sauce; jalapeno cheese grits; whole wheat pizza (unlike bread, pizza crust is almost foolproof to make yourself).
Do you need recipes for any of these? Drop me a line and I'll try to publish as many as I can in the next few days.
Friday, May 8, 2009
Spring sprung from the earth
 I've written how I've come to view fava beans, with their short growing season, as the herald of spring. And they almost are exclusively a home cook's dish, since their preparation time precludes most restaurants from offering them.
Another lovely springtime offering, which also is best fresh, is morels. Even in season, they are very pricey, but the good news is that you don't need but a few ounces to make an impact in a dish. The photograph is of a black morel, courtesy of The Great Morel Picture Page.
If you go hunting for morels yourself, the good news is that the only similar poisonous mushroom is the false morel, and even that one can be tolerated by most people if cooked (but even in Finland, where the false morel is a cherished delicacy, there are deaths from eating them). Here's a bit more information on identifying the difference:
The early false morels can be told apart from the true morels by careful study of how the cap is attached to the stalk. The edge of true morels' (morchella) caps are intergrown with the stalk, but early morels' (verpas) caps hang over like a thimble, for which they are sometimes referred to as "thimble morel." Early false morels are the first morels to fruit in the spring, shortly after leaves begin to form on deciduous trees. Narrow-head morels (morchella angusticeps) fruit next, around May. The last morels to fruit are the yellow or white morels (Morchella esculenta), then crassipes.
Cap: the cap of false morels is wrinkled and irregular, bell shaped or cone shaped, attached only at apex (top) of cap not like true morels which have caps that are attached at the bottom, the color yellow brown to olive yellow or tan, darkens with age.
Stalk: 6-16 cm high, white to creamy or tan, hollow, often stuffed with white cottony pith. Spores when seen under a microscope are elliptical and have large oil droplets; true morels have no oil droplets.
Here's how we used a few fresh morels (purchased from Foods of All Nations) last night.
Twice-as-nice-a-roni with fava beans and morels
Serves 4 as a side dish
Ingredients
1 pound fava beans
1 tablespoon plus 1 teaspoon olive oil, divided use
1/2 cup angel hair pasta, broken into 1/2 inch pieces
1/2 cup basmati or other long grain rice
2 cups non-fat chicken or turkey broth
1 teaspoon butter
4 ounces fresh morels, sliced
Fresh ground pepper
Instructions
Prepare fava beans: Remove the beans from the spongy pods (the pods and the bean casings make great additions to your compost pile). Bring a pot of water to a boil and add the raw beans in their casings. Fill a bowl with water and ice. When the beans have returned to a boil, remove them from the boiling water and put in the bowl of ice water. When cool, remove the beans from their casings. Set aside.
In a saucepan that has a tight fitting lid, saute the pasta bits and the rice in a tablespoon of olive oil over medium-high heat until the rice turns white and the pasta browns. Add the broth and bring to a true boil (the liquid will look like it's boiling when you add it to the hot grains, but will then subside), then cover and turn down the heat to simmer. Set a timer for 15 minutes.
Meanwhile, saute the mushrooms in the butter and teaspoon of olive oil. Add a generous grinding of pepper. When they are almost softened, add the fava beans, and heat until they are just warm.
When the rice/pasta is done, add the morels/favas and stir gently to mix. Serve hot.
Note: If you want more vegetables, a half-pound of crisp-tender asparagus cut in 1/2 slices would be a good addition.
Saturday, April 11, 2009
Fava beans - no liver, no Chianti
 Fava beans are one of my favorite vegetables of spring. This initially came as a surprise to me, since they look a lot like lima beans, and I was a child who spent a lot of my childhood picking the lima beans out of the servings of frozen mixed vegetables my mom liked to serve us several times a week.
I picked up a handful of favas at the grocery store this week. I would have bought more (it takes about a pound of fava beans in their pods to produce a cup of edible beans) but a handful is all that was left. Never mind: That is enough to brighten up a pasta dish, especially with a sprinkling of red pepper flakes. Yes, that's the ticket: 4-6 ounces bowtie pasta, cooked to al dente and drained; a drizzle extra virgin olive oil; shelled, cooked fava beans; a few red pepper flakes; sea salt and freshly ground black pepper to taste. A few threads of basil and some shaved Parmesan, maybe a little crisped ham or bacon bits, and ummm-ummm good.
To prepare fava beans that are past the baby stage (when they can be eaten whole), take the beans out of the pod and throw the pods in the compost. Put the beans, which have a thick outer coat, into a pot of cold water and bring to a boil. Meanwhile, prepare a bowl of ice water. When the beans are in a rolling boil, remove from the stove and drain, and dash them into the ice water. When they have cooled, remove the skins by either pinching them, or using a little sharp knife, cut a slit in the outer coat and push them through. Add the outer coats to the compost pile. Saute the beans in a little oil briefly until just tender. Season if you wish.
Oh, and at the bottom of this post is another reason that favas have gotten a rather bad rap.
Photograph by David S. Deutsch
More Americans are discovering fava beans' buttery texture and lovely nutty taste.
Wednesday, March 4, 2009
Treasures from the deep - deep-freeze, that is
 I found a bag of calamari rings at the grocery the other day; they seemed to be at a decent price, so I bought them. On the bag, it had a recipe for calamari salad, starting with poaching the rings 1 or 2 minutes. OK, I thought, I'll follow the directions, but use them in pasta sauce instead. I've often done that with fresh squid with excellent results.
For starters, I could tell as soon as I put them in the hot liquid that they were chosen for their size, not freshness. But what was worse was they had probably been cooked 1 or 2 minutes before they had been frozen. So add on the poaching time to thaw them and they were overcooked. Chewy. Unappetizing.
A disaster? No way.
I remembered my first taste of calamari, which wasn't like most non-Italians' experience of a mound of deep-fried rings. It was at an Italian restaurant in Philadelphia that had been the site of a mob hit just two weeks before, which meant we were the only non-Italians in the place. Alan ordered me a dish that he said I'd love, but it would be a surprise. Sure enough, it was a plate of what I thought were giant Spaghetti-Os in a very rich and spicy tomato sauce. The white rings had the texture of al dente pasta, but they were calamari.
You can cook calamari to tenderness two ways: Cook them very fast over high heat, just until they become opaque and serve them immediately; or cook them slowly over low heat for at least a half hour. They will relax and expand and become delicious once more.
Saturday, February 21, 2009
Low-calorie, delicious lunch
 Tired of soup? Tired of sandwiches? Here's a lunch that will warm your heart. I made it at home, but it could be packed as a lunch to be made in the microwave at work.
Lori K's fast low-cal, low-carb, low fat lunch
Serves 1
Ingredients
1/4 cup chicken broth
1 tablespoon finely chopped shallot
2 cups raw baby spinach (about 3 ounces)
3 ounces albacore tuna, drained
Hickory smoked salt and pepper, to taste
Instructions
Put broth and shallots in a deep saucepan and bring to a boil. Add spinach (it will look like a lot, but cooks down to about a 1/4 cup) and cover tightly. Boil for one minute. Stir in the tuna, and season with the smoked salt and pepper. Drain (if necessary) and serve.
Per serving: 121 calories, 2 g fat (0.5 g saturated), 5.7 g carbs
If you are watching your salt intake, use no-salt broth and add a little liquid smoke to it instead of using regular broth and hickory smoked salt. Another option would be to use half chicken broth and half lemon juice and skip the smoke.
This would also be good over rice or pasta, or mixed with white beans, for a more filling meal.
Monday, December 8, 2008
Rice-a-Roni, the San Francisco treat?
 While I lived in Northern California, one of my favorite destinations was to San Francisco to take in a meal (or a series of meals, wandering from neighborhood to neighborhood). Yet in all the time I was there, not once, NOT ONCE did I ever EVER come across Rice-a-Roni on a menu! Yet I knew from years of watching television that it was "The San Francisco Treat." It even featured a cable car. So what gives?
Apparently, it was only created there. Here is the company's version of its history:
Like most great products, Rice-A-Roni® began as a well liked family recipe…
The DeDomenico family all enjoyed an old Armenian dish consisting of rice, vermicelli pasta and chicken broth. The rice and pasta were sauteed in butter before the liquid was added, giving the dish its distinctive taste.
In 1958, Vince DeDomenico decided to take this recipe and produce it for sale in grocery stores. He placed the rice and pasta in a box, and added a dry seasoning mix in place of the liquid chicken broth. Because this product was made up of half rice and half pasta, he decided to call it RICE-A-RONI®.
Chicken RICE-A-RONI was first introduced in the northwestern states in 1958. With it came the first RICE-A-RONI commercial, featuring San Francisco's Cable Cars and the now famous jingle. Created in San Francisco, RICE-A-RONI would soon be known to all as "The San Francisco Treat®!".
I long ago swore off the stuff, since the rice no longer tasted like rice, and it had more sodium in it than a person needed in a week. But I always liked the way it looked and decided to cook my own at home. It was surprisingly delicious!
Lori K's Twice-as-Nice-a-Roni
Makes 3 cups
1 tablespoon oil or butter
½ cup filini pasta (or vermicelli pasta broken into 1 inch pieces)½ cup bastmati rice
1¾ cups chicken or beef broth
Heat the oil or butter over medium high heat; when hot, add the pasta and sauté until it begins to brown, then add the rice and continue stirring until the most of the rice turns white or begins to brown. Add the broth and turn up the heat to boil. When it comes to a boil, cover and turn heat down to low. Cook for 15 minutes, fluff and serve hot.
Subscribe to:
Posts (Atom)